Friday, March 30, 2012

Chocolate Cherry Vanilla Dr. Pepper® Cupcakes

Remember those Orange Crush Cakes from a couple weeks ago? Well, I decided to go ahead and try a different combination of flavors with the same recipe since Duncan Hines® was kind enough to send me free samples of their new Frosting Creations™ products. One of the flavors I received was cherry vanilla, and that got me thinking... I wanted to try Dr. Pepper® in chocolate cake mix, and there IS such a thing as Cherry Vanilla Dr. Pepper®, sooo... that's how this combination was born.

Preheat the oven to 350ᵒF. You'll need the following ingredients.

1 (18.25 oz.) box of your favorite chocolate cake mix
1 (12 oz.) can* of Dr. Pepper®, room temperature
1 (16 oz.) can of Duncan Hines® Frosting Creations™ Frosting Starter
1 packet of Duncan Hines® Frosting Creations™ Cherry Vanilla Flavor Mix


*Again, I bought a 20 oz. bottle of Dr. Pepper® out of convenience (besides, I get to drink the remainder =P) and measured out 12 oz., which is 1 1/2 cups.


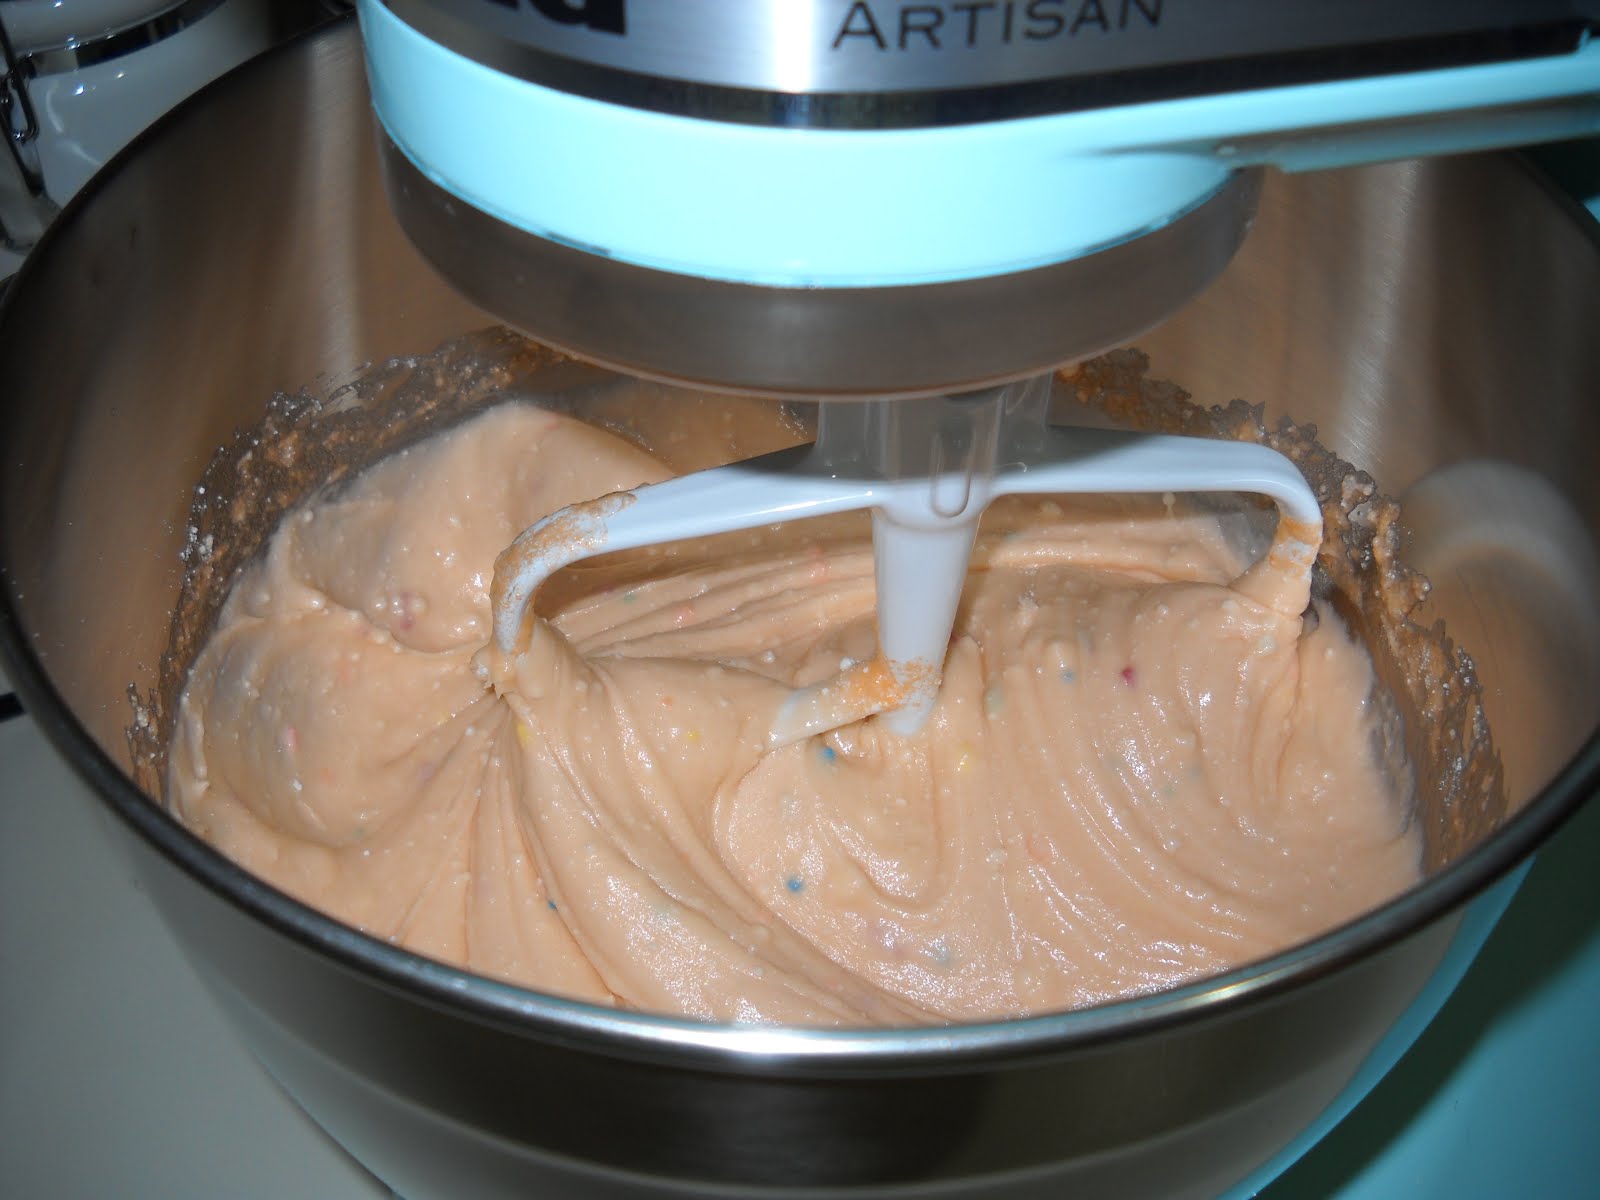
Combine the cake mix and room temperature soda; it will foam up.


Mix it up on low speed for about 30 seconds to get it started, then scrape the sides of the bowl and paddle as needed. Turn up the speed a couple notches and let it mix for a couple of minutes, scraping the bowl as needed. The batter will appear thicker than normal since we're using less liquid than is called for in the usual cake mix recipe.


Carefully spoon the batter into a paper-lined cupcake pan, filling each about 2/3 to 3/4 full. This time around I got 18 cupcakes total.


Bake at 350ᵒF for 18-20 minutes. The cupcakes are done when a toothpick comes out clean, or when you lightly press a cupcake with two fingers and it springs back up. Let the cupcakes cool in the pan for a bit before removing them and placing them on a cooling rack.


Once the cupcakes are completely cool, stir up the frosting as directed on the packages and frost the cupcakes as desired. Since the recipe yields fewer cupcakes than usual, I like to really pile on the icing. After all, I don't want it to go to waste! And I finished them off with some sprinkles and mini straws, just like with the Orange Crush Cakes. Of course, this is optional, but I think it's a cute touch. =) For the mini straws, just cut regular drinking straws into four equal lengths with a pair of scissors. When you stick the straws into the cupcakes, make sure the bottom of the straw does pierce the actual cake so that it will stay put.


Cute, huh?

I took these cupcakes to my Japanese class, and people seemed to really enjoy them. Yay, another success!

What other flavors of soda cupcakes might be good, do you think?

Your Cupcake,

~Jesia <3

Classic Pasta Bake

So, I love pasta. Whether it's spaghetti and marinara sauce, macaroni and cheese, ravioli, fettuccine alfredo, or lasagna, I love it all. So I found a baked pasta recipe that looked good and gave it a shot. While the recipe I went off of said there were six servings, this 13"x9" pan of dense pasta, beef, sauce, and cheese fed eight (of course, we had garlic cheese bread to go with it too).

This recipe isn't particularly difficult, but it does involve several steps and some time. And of course, there is plenty of room to add your own special flair. So preheat the oven to 400ᵒF and assemble the following ingredients.

1 (8 oz.) package uncooked pasta, any shape (I chose ziti)
2 tablespoons butter
1 cup grated Parmesan cheese, divided
2 (15 oz.) containers ricotta cheese
1 jar (about 24-26 oz.) of your favorite pasta sauce
1 lb. (16 oz.) ground beef
1 (8 oz.) package shredded mozzarella cheese
desired assorted spices (I used Italian seasoning, parsley, garlic, chopped onion, salt, and pepper)

First thing's first: prepare a 13x9x2-inch baking pan with foil and cooking spray. Trust me, this will make clean up SO much easier.


Boil the pasta as directed on the package. I ended up using a little more than 8 oz. since I had a 16 oz. box and couldn't measure exactly. Once the pasta is done to your liking (I like mine a little more tender rather than al dente), drain off the water and return the pasta to the pot. Toss in the butter and gently stir it into the hot pasta, letting it melt and coat all of the noodles. Then add 1/2 cup grated Parmesan cheese and stir gently again, coating each noodle. I also added some spices at this point: Italian seasoning, parsley, garlic, and chopped onion. Set your pot of pasta aside for now.


Brown the ground beef in a skillet; during this process I went ahead and added some chopped onion, salt, and pepper. Drain off the fat. Return the beef to the skillet and add the pasta sauce. Combine the beef and sauce and heat on medium-low until warm and bubbly.


Spread about half of the prepared pasta in the bottom of your lined and greased pan.


Then spread one of your 15 oz. containers of ricotta cheese on top of the layer of pasta. I simply put spoonfuls of the ricotta all over the pasta and spread it out with the back of a spoon as I went along. Then sprinkle about 1/4 cup of grated Parmesan on top of the ricotta layer.


Now carefully spread about half of the meat sauce over the cheese layer.


Repeat the layers with the remaining half of the prepared pasta, 15 oz. ricotta, 1/4 cup Parmesan, and meat sauce. Finish it off by sprinkling the mozzarella cheese on top along with more spices, if desired.


Wait! Before you put it in oven, get a sheet of aluminum foil and spray one side with cooking spray. Cover the baking dish with the sprayed side toward the food, then bake at 400ᵒF for 30 minutes. Remove the aluminum foil and bake for an additional 15 minutes or until golden brown.


Ta-dah! It's ready! Just wait a bit for it to cool and be careful dishing it up. Enjoy with some bread, and make sure you have plenty of people to help you eat it!


Mmmmm, yummy, hot, and filling. =)

Your Cupcake,

~Jesia <3

Thursday, March 22, 2012

Trail Mix

So, a few friends and I are heading to St. Louis this weekend for a couple of concerts, and I thought it might be interesting to put together a snack for the road. I've never made a trail mix or anything similar, so I did a bit of research online about what kind of ingredients would be good to include.


You can't have a snack mix like this without nuts, and since the only kind of nuts I like (and am not allergic to) is peanuts, that's what I decided on. I chose dry roasted, unsalted peanuts. After all, a couple of the other ingredients have salt, and you don't want too much.

Next is grains. I chose pretzel sticks, cheddar Goldfish® crackers, and granola. I wanted to get whole grain pretzels and Goldfish®, but unfortunately they weren't available in the store I went to.

Next is dried fruit. I decided to try some dried cranberries. I also wanted to try some yogurt-covered raisins, but I was a little put-off by the fat content (7 grams per 2 tablespoons), so I skipped that. However, now that I've tried the dried cranberries, I may yet get some raisins; the cranberries are too tart for my taste, even though they're sweetened.

Then, of course, you want something chocolate, right? I got some dark chocolate M&M's®. Dark chocolate contains antioxidants, and it's supposed to help put you in a better mood.

So, we've got sweet, tart, and salty, crispy, crunchy, and chewy. There's grains, fruit, nuts, a bit of cheese and chocolate. All you do is grab a container and start pouring in the ingredients a little at a time. I used a spoon to gently mix it up and kept adding ingredients until the mixture seemed "right."


Since this was my first time making a snack mix, I really wasn't sure how to go about it. I mean, how do you know what ratio of things is good and what goes together and what doesn't? So this was a complete experiment for me. A bit of a gamble, you might say. At the very least, I like all of the ingredients I chose separately (well, except for the cranberries), so hopefully they're okay together!

Happy trails!

Your Cupcake,

~Jesia <3

Tuesday, March 13, 2012

Orange Crush Cakes

So, baking a cake generally requires a few common ingredients, right? For example, a simple boxed cake mix usually requires water, eggs, and either oil or butter. Guess what? For this recipe, throw out those notions. All you need to bake cake is a cake mix and a can of soda.

Say what?

That's what intrigued me in this 2-ingredient recipe for Soda Can Cupcakes. How can you bake a cake without eggs and oil? What is this madness? The fun part is that you can choose any flavor soda and cake that you want. I know from experience that Coca-Cola® is great in chocolate cake, so I wanted to do something a little different. (Plus, my boyfriend doesn't like chocolate, so I wanted to make something he would eat. =P) That's when I decided I wanted to use my favorite cake mix, Funfetti®, and mix it with orange soda. Plus, Duncan Hines® has a neat new product called Frosting Creations™, and what do you know? They have an orange crème flavor. =)

So here's what you need for what I call Orange Crush Cakes. Also, don't forget to preheat the oven to 350ᵒF.

1 (18.25 oz.) box of your favorite white or vanilla cake mix
1 (12 oz.) can* of your favorite orange soda
1 (16 oz.) can of Duncan Hines® Frosting Creations™ Frosting Starter
1 packet of Duncan Hines® Frosting Creations™ Orange Crème Flavor Mix


*I realize that the picture above shows a bottle of soda, but I did not use the whole thing. I simply couldn't find a single can, so I bought a 20 oz. bottle and measured out the 12 oz., which works out to be 1 1/2 cups.


Simply combine the cake mix and soda in your mixing bowl. It will foam up, which is kind of neat.


Mix it up on the lowest setting until it's combined; scrape the sides of the bowl as needed, then turn up the speed a bit until it's a nice batter. It will appear a little thicker than a regular cake mix batter, since we're using less liquid.


Spoon the batter carefully into your cupcake pan; I like to use paper cupcake liners for less mess. I filled each about 3/4 or a little more full. I ended up getting a total of 17 cupcakes.


Then bake them up at 350ᵒF for 18-20 minutes. They're done when a toothpick inserted into a cupcake comes out clean. You can also lightly press the top of a cupcake with a finger, and if it springs back up, it's done!


Let the cupcakes cool in the pan for a bit before removing them, then let them cool completely on a wire rack. Once the cupcakes are cool, they're ready to be frosted! Simply follow the directions on the Duncan Hines® Frosting Creations™ packages: make a deep hole in the icing, add the flavor mix, and mix it well.

I'd like to say thank you to my boyfriend, Paul, who came over to help me decorate the cupcakes. Thank you, sweetie! =)


Frost those cupcakes!


You could stop there, of course, but I wanted to make these cupcakes a little special. After all, I ended up making them for Sara's birthday, a friend I've known since middle school. =) She loves orange cake, so the timing couldn't have been better! We added some rainbow sprinkles...


Then I thought, "You know, since these cupcakes are inspired by orange soda, little straws would be a cute touch! Wait a second... I happen to have some straws!" We cut a few straws into four pieces each and carefully inserted one mini-straw into each cupcake.


Ta-dah! We have a batch of cute Orange Crush Cakes.


I'm very pleased with the way these cupcakes turned out. They have a light, refreshing orange flavor, and the frosting has a very sweet orange crème flavor. The texture of the cake is a little different since there's no egg or oil, but it isn't too noticeable and isn't a bad thing. By the time I left my friends' house (called "Sketchy House") last night, at least 10 of the 17 cupcakes were gone. I'm pretty sure they were a success!

If anyone else tries their own version of Soda Can Cupcakes, let me know how they turn out! I'd like to try a chocolate cake with Dr. Pepper® sometime. ;)

Your Cupcake,

~Jesia <3

Friday, March 9, 2012

Easy Reese's® Cookies

I love chocolate and peanut butter, so naturally I love Reese's®. The new unwrapped minis are my favorite! They're just so cute. So when I saw a recipe for Peanut Butter Cup Chocolate Cake Mix Cookies, I knew I needed to try them. As much as I love baking made-from-scratch cookies, sometimes a mix is just easier. (I admit, as far as cakes go, I think cake mix cakes taste better than made-from-scratch, but that's just me.)

Anyhow, you'll need the following ingredients. Also, don't forget to preheat the oven to 350ᵒF.

1 (18.25 oz.) box of your favorite chocolate cake mix
1/3 cup vegetable oil
2 eggs
1-2 Tablespoons milk (water probably works just as well)
1/4 cup peanut butter (creamy or crunchy, however you like it!)
1 (8 oz.) bag of Reese's® Minis


Combine the cake mix, oil, eggs, milk, and peanut butter in your mixing bowl and mix it well. You'll have a thick cookie dough.


Add the Reese's® Minis.


Turn the mixer on low and watch the Reese's® Minis carefully. You'll want to mix them in well and have them break up a little so you have chunks of candy throughout the dough, but you also don't want to pulverize them. The dough will look something like this.


Now it's time to scoop the cookie dough onto baking sheets covered in parchment paper. I like to use a small ice cream scoop (also marketed as "cookie scoops") to make the cookies uniform; this not only makes them pretty, but it ensures they all bake at the same rate. (Plus you don't have to get your hands dirty!)


Bake at 350ᵒF for about 9 minutes. When you take the baking sheet out of the oven, the cookies will look a little underdone, but they'll firm up as they sit on the warm pan. This will take a few minutes. Then transfer the cookies to a cooling rack (or to your mouth), and voila!


As you can see, I did make some changes to the original recipe that I found. I thought that there wouldn't be enough peanut butter flavor for my taste, so I added 1/4 cup of creamy peanut butter. However, after I had the dough all mixed up, it seemed a little crumbly. That's where the milk came in to the rescue.

I do have to say that I wish I had gone with a lighter chocolate cake mix. I thought maybe the dark chocolate mix would kind of balance out the sweetness of the milk chocolate in the candy, but I think that was a bit of a miscalculation. The dark chocolate actually kind of overwhelms the Reese's® and peanut butter flavors; I'm thinking next time I would use a milk chocolate or devil's food cake mix instead. I also wonder if more peanut butter (perhaps 1/3 cup?) would have resulted in a more flavorful cookie. It may also be helpful to zap the peanut butter in the microwave for a few seconds so that it can mix more easily into the dough. Of course, this is all speculation. Clearly I'll have to try again someday. ;)

If you happen to try this recipe, please let me know how yours turns out!

Your Cupcake,

~Jesia <3

Wednesday, March 7, 2012

And so it begins...

It's been a little over a year since I completed the Toll House Experiment, trying 70 of Nestlé Toll House's "best-loved" cookie and bar recipes over the course of the year 2010.

Of course, things have changed since then. I graduated with my bachelor's degree last December (yeah!), and now I'm looking for a job. Two things that haven't changed? My love for baking and the simple fact that I'm still trying to navigate through this crazy world to figure out what I want to do with my life. Yeah, I'm still not sure what I want to do... But you know what? I'm hopeful that I can try a lot of different things along the way, which brings to me back to blogging.

I'm 23 years old, and I have a wonderful boyfriend. Both of us like to cook and bake. Now that I'm out of the dorm and in an apartment with my very own kitchen, it's become more convenient to cook and bake. So why not try new things? After all, it would be nice to have a collection of tried-and-true recipes to refer back to someday when I have my own home and family to care for.

My goal for this blog is simply to try new things in the kitchen, hopefully at least twice a month, and record the results. I've found a lot of recipes through Pinterest that I'd like to try, most of them from other cooking blogs. While I call my new blog "Call Me Cupcake!", the posts will not be exclusively for sweets and desserts. However, don't be surprised if there are more dessert recipes than anything else; after all, baking sweets is more my forte. <3

I already have a recipe in mind for the first official post, but until I make it, it's going to be a S-E-C-R-E-T... ;) So please stay tuned, and I hope you enjoy!

Your Cupcake,

~Jesia <3